Grand Masters Scenario

Table of Contents
- Basic Information
- Scenario Link and Character-specific Events
- Knowledge Fragments, Crystals, and the Goddess' Wisdom
- Grand Masters Championship
- Scenario-specific Skills
- Base Training Values
- Unique Skill Level-Ups
- Training Facility Levels
- Scenario Factor
- Stat Caps
Basic Information
Grand Masters: To Our Descendants (for short: Grand Masters, or GM) is an Uma Musume scenario released on February 24, 2023. It's the fifth permanent scenario added to the game, and is part of a collaboration with Sega's horse racing game StarHorse 4 (only available in Japanese arcades).
As with other scenarios, it builds on the game's core mechanics, so this guide will assume you have a basic understanding of how to play. If you do not, or you'd like a refresher, please read the Beginner's Guide before proceeding with this guide.
In the scenario's story, Satono Diamond and Satono Crown's household, the Satono Group, has developed a revolutionary VR device called the "Mega Dream Supporter." The gadget's purpose is to support both the trainer and the horsegirls in preparation for the Twinkle Series.
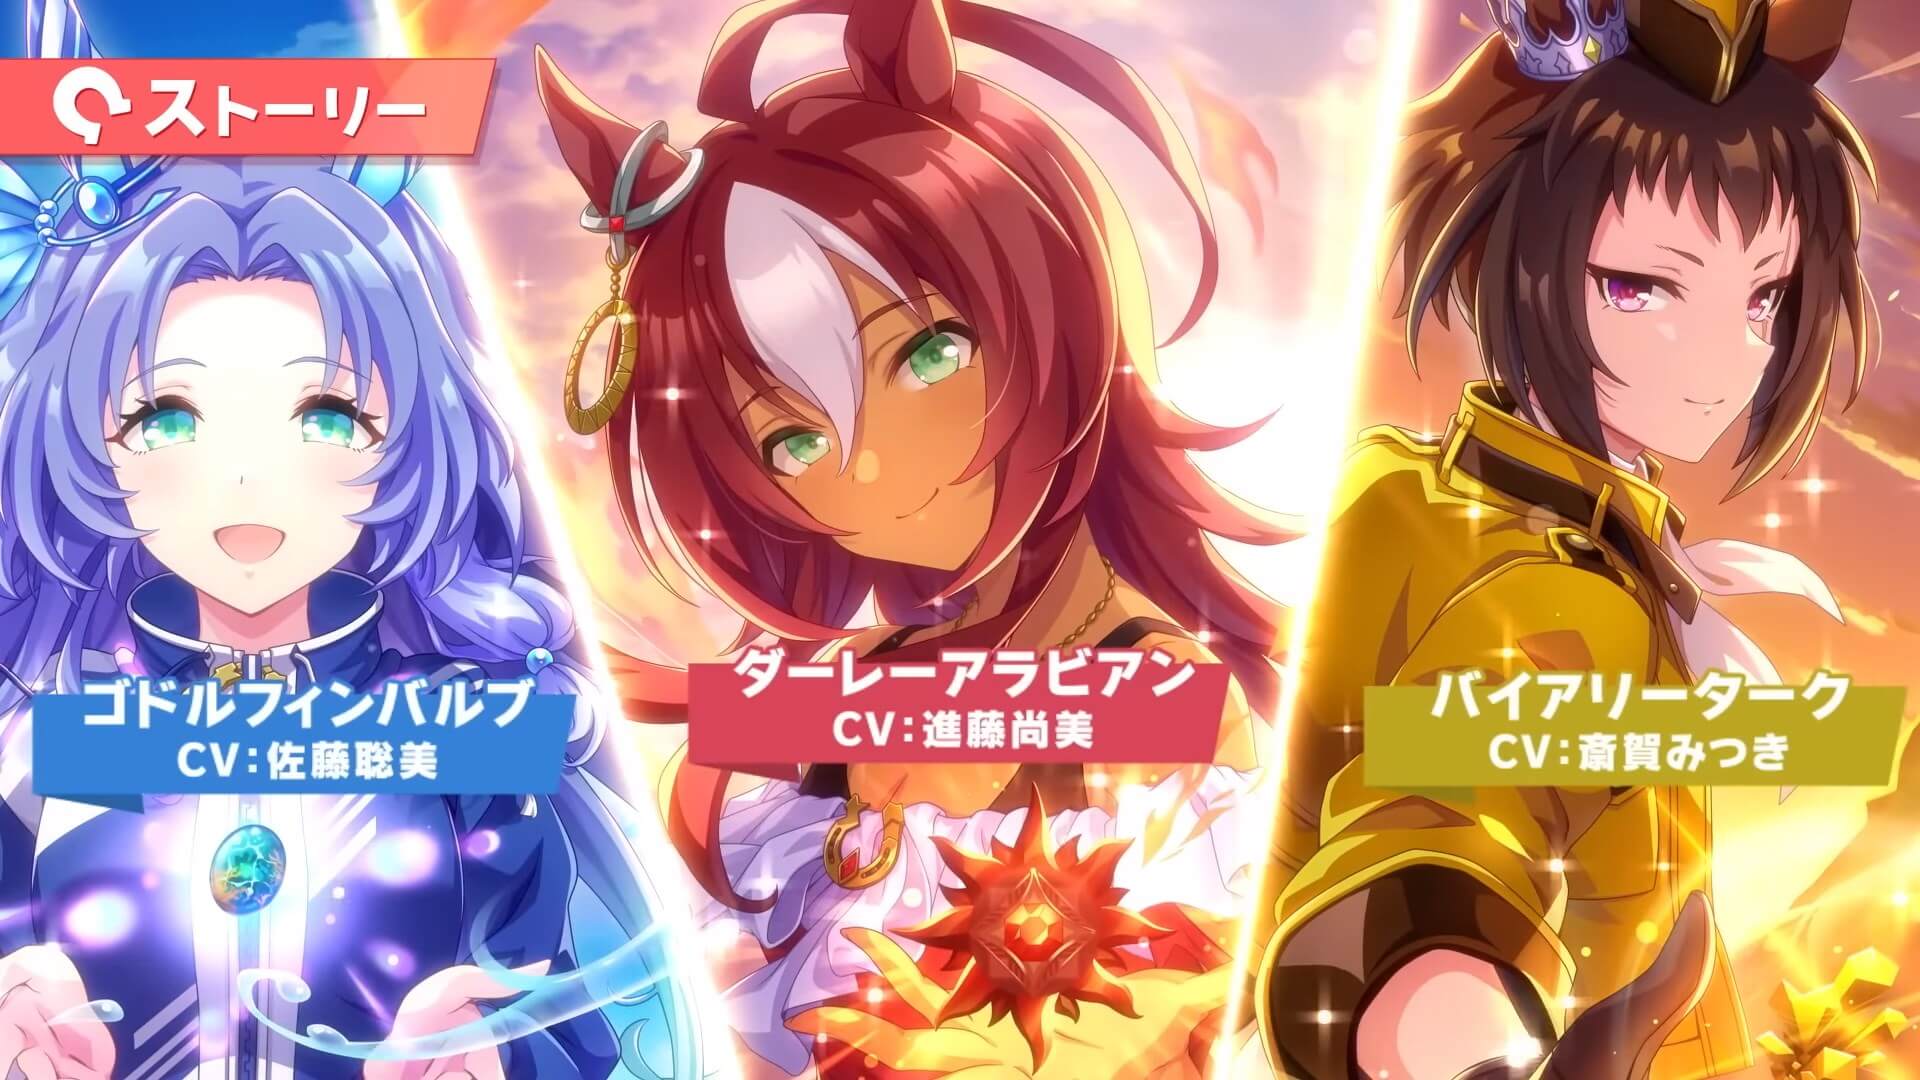
Within the virtual world, it's possible to do both training and racing, all while being assisted by three training support AIs, each carrying the name of one of the three legendary goddesses.
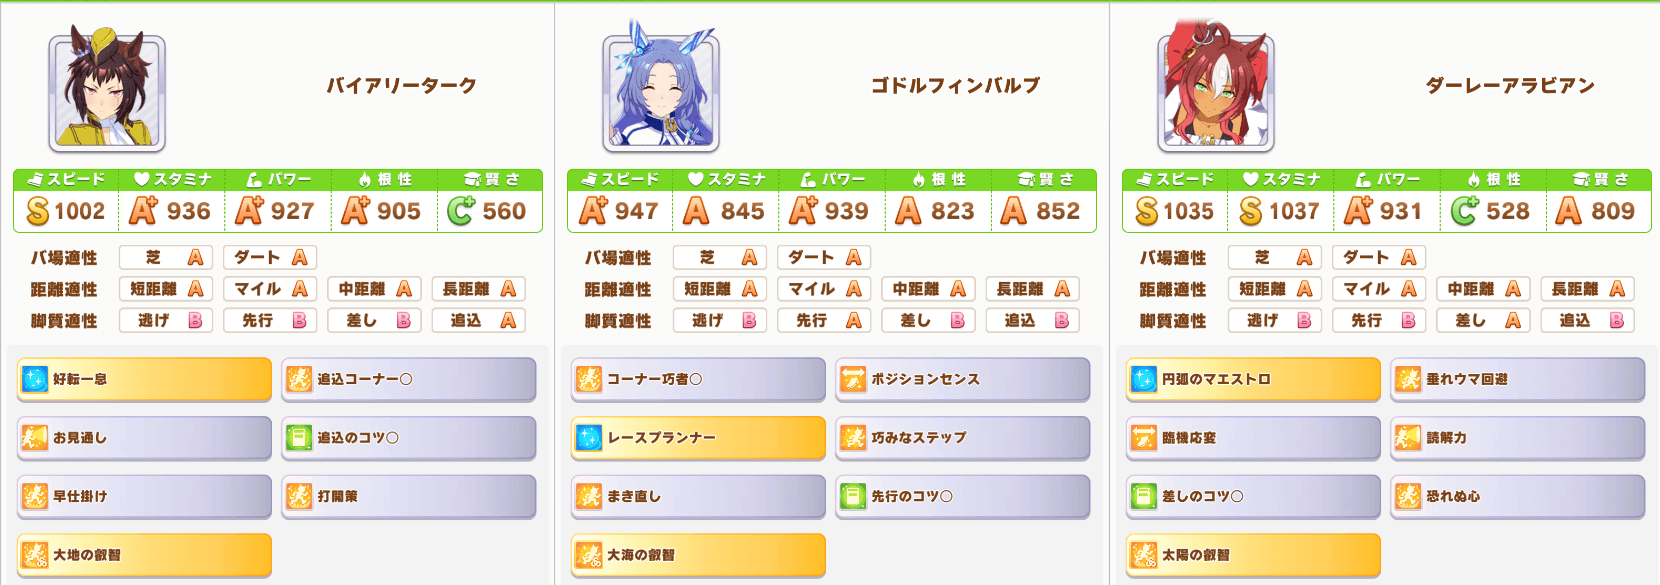
The names of these three are Godolphin Barb (voiced by Satomi Satō), developed with the concept of affection and love, Darley Arabian (voiced by Naomi Shindō), developed with the concept of bravery, and Byerley Turk (voiced by Mitsuki Saiga), developed with the concept of order and discipline in mind.
Scenario Link and Character-specific Events
The "Ancestors & Guides" support is the only card with a scenario link in Grand Masters. Before the card was released, the scenario had none.
Character-specific hidden events, such as winning the Sprinter Stakes twice with Sakura Bakushin O, are available.
Knowledge Fragments, Crystals, and the Goddess' Wisdom
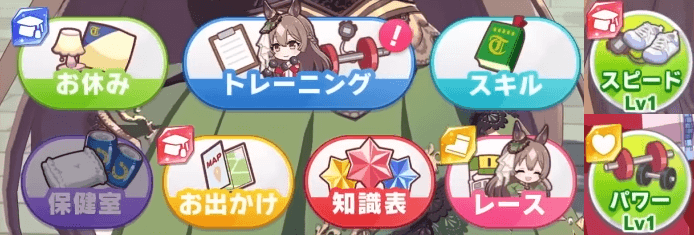
In Grand Masters, training, resting, going on outings, and racing will allow you to gather "Knowledge Fragments" (知識の欠片) starting from turn 3. Two of these can then be combined into "Knowledge Crystals" (知識の結晶).
An icon on the top left of the respective button will specify what fragment you can earn from that particular action.
Objective races will always award 2 identical fragments. These will be awarded by the respective goddess in a training event after the race.
You may also randomly be able to acquire two fragments from other actions, marked by "x2" text on the action's fragment icon. These will be identical pieces. Training will always provide double fragments for Friendship (rainbow) training, but never for normal training. Wisdom training is an exception for this, as it will only rarely provide double fragments even during a Friendship training.

If you currently have 7 fragments, a double cannot trigger. If you currently have 8, no action will award any fragments. This is also true for actions that are normally guaranteed to give (double) fragments.
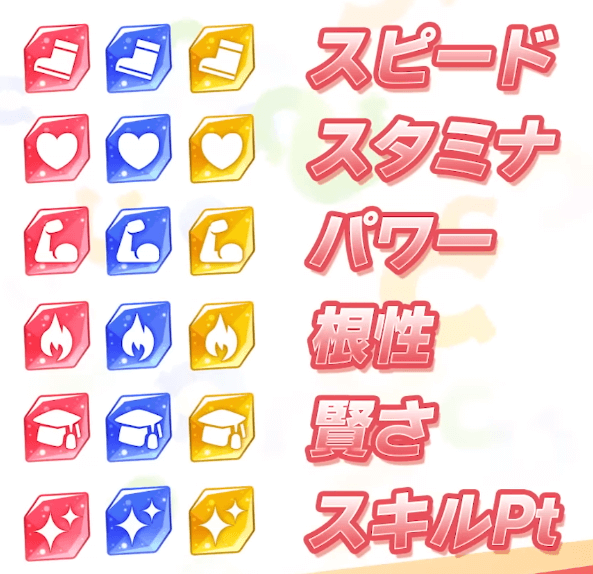
Fragments and crystals exist in three colors - red, blue and yellow, each corresponding to one of the three goddesses - and six types, one for each stat plus one for skill points. That makes for a total of 18 possible combinations.
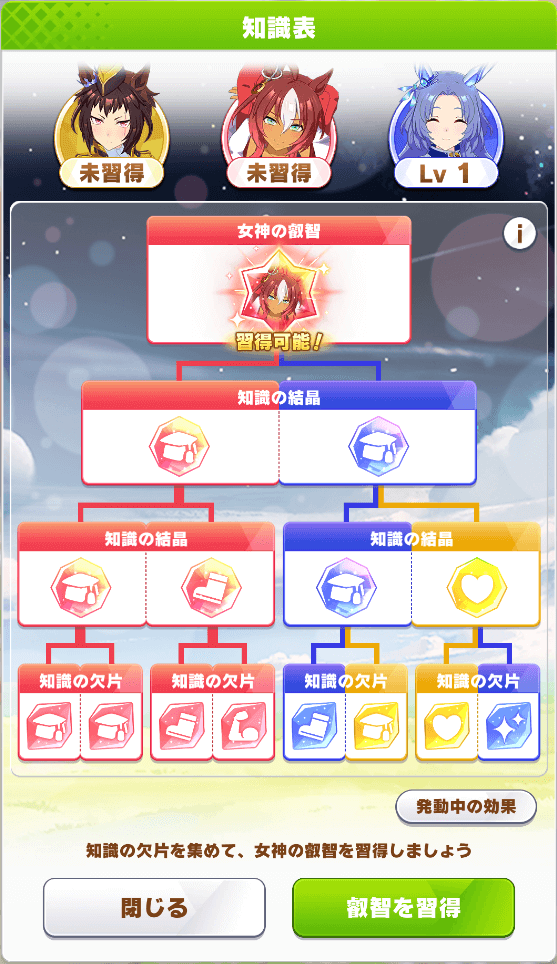
The "Knowledge Table" button (知識表, between outings and races) will show you an overview of the fragments currently in your possession.
Aside from the Knowledge Table, your current fragments will also be displayed on the middle left of the screen. You can also check the currently active effects with the yellow "Active Effects" (発動中の効果) button below this inventory.

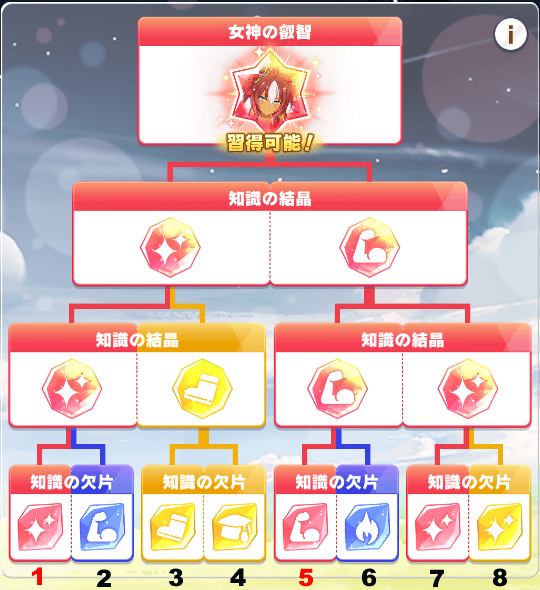
Every two fragments in the inventory will combine into one Knowledge Crystal, and two crystals (i.e., four fragments) will again combine into a "merged" crystal. Finally, two of these "merged" crystals (i.e., all eight fragments) will combine into one "Goddess' Wisdom" (女神の叡智). There are three types of these, one for each AI goddess.
Unlike fragments and crystals, which combine automatically, you must manually trigger a Goddess' Wisdom via the "Obtain Wisdom" button (叡智を習得, in green on the bottom right) in the Knowledge Table. You cannot obtain any more fragments until the turn after you do so.
The result of a combination is chosen differently for color and type of the material used. Based on testing so far, the color of the left fragment (or crystal) has consistently been chosen as the outcome. The type however seems random between both. With this theory in mind, that would mean a blue speed fragment (left) and yellow power fragment (right) would always combine into a blue crystal, whose type is either speed or power.
The two "merged" crystals combining into a Goddess' Wisdoms are the exception for the above theory. If both crystals are the same color, the Goddess' Wisdom is guaranteed to have that color. If they are different, the color which you have more fragments of will be picked (i.e. only the bottom row counts). Ties will be broken up by a coin flip.
Taking these two theories together, you can control which Goddess' Wisdom you get via the first and fifth fragment, as these form the left side of each left crystal (and thus will decide the color of the table overall), as seen in the example below.
The fragments you currently own will raise their respective stat gain from training by one. For example, a stamina fragment will give you +1 bonus stamina when training in Stamina or Power facilities. The color is unimportant for this.
Crystals have the same effect, but with a raise of 2 when both components are the same color and 3 when the colors are different.
The effects of the combined crystals are separate from those of the base fragments or crystals. For example, if you have a power fragment and a skill point fragment that combine into a power crystal, you will receive a bonus of 1 power and 1 skill point from the fragments, and also 3 power from the crystal on top of that.
We've already talked about the "Active Effects" button (発動中の効果) below the inventory. The same button (just in white) appears on the bottom right of the Knowledge Table. It leads to the summary of all currently active effects.
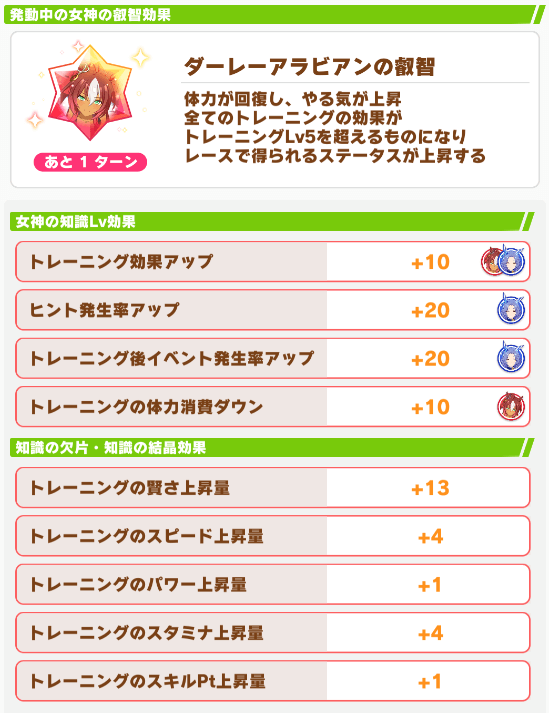
The first section of this overview showcases the one-turn-only effects currently received from any of the three Goddess' Wisdoms. The second section displays the permanent effects of the same. The third section shows any effects gained from fragments or crystals of your current Knowledge Table.
Once you obtain a Goddess' Wisdom, the level of the respective Goddess AI will be raised by one, permanently increasing the training bonuses they grant for this run. You will also receive a one-turn-only bonus independent of the level.
The following permanent bonuses are granted depending on their level (starting at 0 with no bonus):
| Godolphin Barb (Blue) | Level 1 | Level 2 | Level 3 | Level 4 | Level 5 |
|---|---|---|---|---|---|
| Hint Rate Up | +20% | +25% | +30% | +33% | +35% |
| After-Training Event Chance Up | +20 | +25 | +30 | +33 | +35 |
| Training Bonus | +5% | +8% | +11% | +13% | +15% |
| Darley Arabian (Red) | Level 1 | Level 2 | Level 3 | Level 4 | Level 5 |
|---|---|---|---|---|---|
| Energy Discount | 10% | 15% | 18% | 20% | 23% |
| Training Bonus | +5% | +8% | +11% | +13% | +15% |
| Byerley Turk (Yellow) | Level 1 | Level 2 | Level 3 | Level 4 | Level 5 |
|---|---|---|---|---|---|
| Support Event Effect Up | 10% | 15% | 20% | 23% | 25% |
| Support Chain Event Chance Up | +20 | +40 | +60 | +80 | +90 |
| Training Bonus | +5% | +8% | +11% | +13% | +15% |
The following one-turn-only bonuses are granted on activation, independent of their level:
Godolphin Barb (Blue): Every support card on the same training facility will give a skill hint (you will receive one hint from each card on the training, not only one hint total) and a small amount of extra stats and skill points. The chance/effect of after-training support events for friend and group cards is increased.
Darley Arabian (Red): +50 Energy, Motivation raised to maximum (Perfect), All training facility effects are increased past level 5 (marked by a red border around the facility buttons), +35% stat gain from races
Byerley Turk (Yellow): Every support card will trigger Friendship Training, no matter their bond level or card type / current facility (e.g. a power card with a green bond on guts will still trigger a rainbow)
After one turn, the temporary effect will fade, and your Knowledge Table will reset. If you want to review your previous Knowledge Tables, use the "i" button in the top right of the current table.
The effects gained from fragments and crystals before the reset will not be retained, which means only the permanent effects of the Goddess' Wisdom will remain.
As each Goddess' Wisdom takes 8 fragments, and one to two fragments are obtainable each game turn, you can obtain a maximum of about 9-11 Goddess' Wisdom levels across the entire training run.
Grand Masters Championship
The Grand Masters Championship is made up of three special races plus its final, held in collaboration with Sega's StarHorse 4 arcade game. Unlike StarHorse 4's part of this collaboration, the races in the Umamusume game are permanently included in the Grand Masters training scenario. The URA Finals races (Qualifiers, Semi-Finals and Finals) are not held in the Grand Masters scenario.
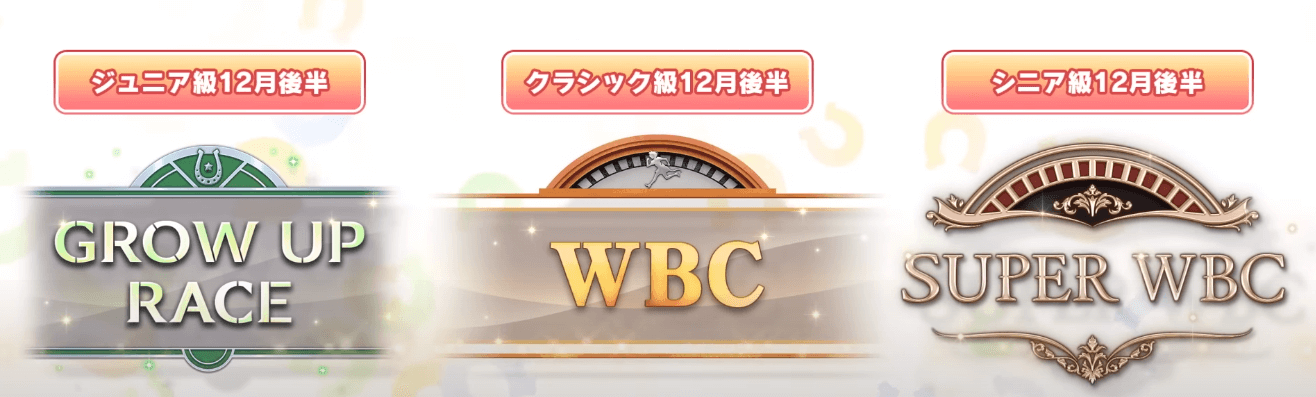
One of these races is held at the end of each respective year, in Late December after all other actions have taken place. Their distance can vary and is decided similarly to the final race of the URA Finals, being based on the type of race you have done most up to this point. The remaining turns to these races are displayed on the top left of the screen, below the character objective turn counter. In the below example, there are 4 turns left until the next character objective, and 16 turns until the Grow Up Race (GUR).

Unlike character objectives, failing any of the three year-end races will not cause a game over. The titular "Grand Masters" race, which serves as the finale of the scenario, will be held beyond the end of year 3, after you have bested all character objectives. You will be given 5 training turns after the SWBC before the Grand Masters race is carried out. In it, you will additionally face the three goddess AIs as opponents.
The three year-end races and the final Grand Masters race will award some guaranteed stats and skill points.
You can additionally receive bonuses for the year-end races from each of the three goddesses if their level is equal to or higher than the number of the year the race is in. For example, if you have all three goddesses at level 1 before the GUR (first-year race), you will receive a bonus from all three. If you only have Darley Arabian at level 2 before the WBC (second-year race), you won't receive a bonus from the other two.
These bonuses are the following (where "Strategy Hint" refers to the strategy you used in the respective race):
| Year / Level | Base Rewards | Godolphin Barb (Blue) | Darley Arabian (Red) | Byerley Turk (Yellow) |
|---|---|---|---|---|
| Junior / 1 | All Stats +10 +50 SP | 1 Strategy Hint | +20 SP | Random Stat +10 |
| Classics / 2 | All Stats +15 +60 SP | 2 Strategy Hints | +30 SP | 2x Random Stat +10 |
| Senior / 3 | All Stats +20 +70 SP | 3 Strategy Hints | +45 SP | 3x Random Stat +10 |
| GM | All Stats +20 +80 SP | --- | --- | --- |
Scenario-specific Skills
Grand Masters features six scenario-specific skills, two for each of the three Goddess AIs:
Darley Arabian (Sun): and
Godolphin Barb (Ocean): and
Byerley Turk (Land): and
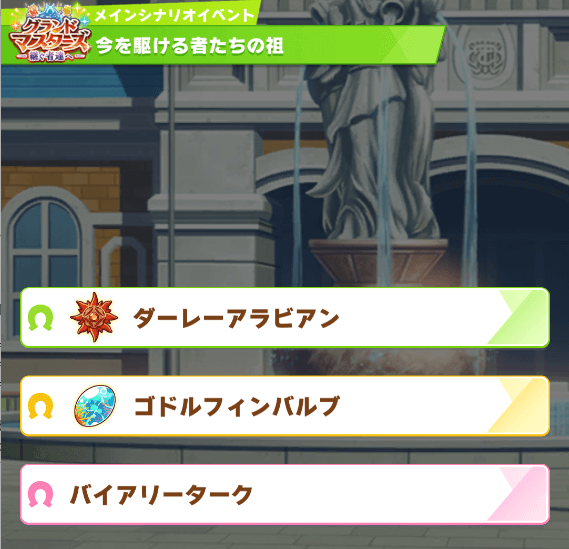
You will be able to receive a level 1 hint for one such skill in the 「今を賭ける者たちの祖」event that occurs one turn before the Grand Masters race by selecting the goddess corresponding to the skill.
If the selected goddess has a Goddess' Wisdom level of 4 or higher (signified by a symbol next to the choice), you will obtain a hint for the rare version of the skill. If she is level 5, you will get hints for both the rare and normal versions. Levels below 4 will award the normal version hint.
Additionally, a total Goddess' Wisdom level of 12 spread across all three (i.e. 4/4/4, 3/5/4 or 2/5/5) will award you with a level 3 hint instead of level 1.
Alongside the scenario-specific skills, you will be given a level 1 hint for the skill at the end of the training run if you raise the level of all three goddesses to at least 3. If you win all three special races (i.e. the GUR, WBC and SWBC) you will be given a level 1 hint for the skill.
Base Training Values
These are the base training values for the Grand Masters scenario. What this means is that training at the specified facility, without any support cards present and without accounting for character growth rate bonuses, will yield the following stats at facility level 1.
| Facility | Stat gains | Energy |
|---|---|---|
| Speed | +10 Speed, +3 Power, +5 SP | -19 |
| Stamina | +8 Stamina, +6 Guts, +5 SP | -20 |
| Power | +4 Stamina, +9 Power, +5 SP | -20 |
| Guts | +2 Speed, +3 Power, +9 Guts, +5 SP | -20 |
| Wisdom | +2 Speed, +8 Wisdom, +5 SP | +5 |
Unique Skill Level-Ups
The mechanic for unique skill level-ups in Grand Masters is the same as that of the URA Finals scenario. That means getting 60.000 fans by Valentine's Day (Early February), 70.000 fans by Early April, and 120.000 fans by Christmas (Late December) of the Senior year (the third year).
These values are 40.000, 60.000, and 80.000, respectively, for characters with high dirt aptitude but low turf aptitude (such as Haru Urara or Smart Falcon).
The April level-up also requires you to have a green bond gauge (3 bars) with chairman Akikawa.
Training Facility Levels
In Grand Masters, there are several ways to level up the training facilities. One is the same as the URA Finals scenario, where their level will rise for each four turns spent training on it (starting at level 1 and ending at level 5). Another is winning the Grand Masters special races (GUR, WBC and SWBC), which will raise some training facility levels by one. How exactly this works is still under investigation.
Additionally, the effects of every training facility can be temporarily raised beyond level 5 for a single turn when obtaining one of Darley Arabian's Goddess' Wisdoms.
Scenario Factor
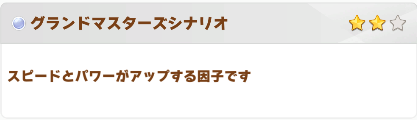
The Grand Masters scenario factor is called "Grand Masters Scenario" (グランドマスターズシナリオ) and raises Speed and Power when triggered during inheritance events.
Stat Caps
The Grand Masters scenario has the following base stat caps:
| Stat | Cap |
|---|---|
| Speed | 1500 |
| Stamina | 1400 |
| Power | 1500 |
| Guts | 1300 |
| Wisdom | 1300 |